This article is being updated. Please be aware the content herein, not limited to version numbers and slight syntax changes, may not match the output from the most recent versions of Bright. This notation will be removed when the content has been updated
This guide walks through configuring Bright Cluster Manager 7.1/RHEL7 to deploy Windows Server 2008 R2 onto the compute nodes.
Bright Preparation for Windows Deployment
To deploy Windows Server 2008 R2 using Bright, some preparation must be done first:
Samba installation and configuration on the Head Node
Windows installations require a network file system to access the installation source.
Since Bright is Linux-based, Samba can be used to share the files.
The following steps install and configure the required packages:
- The following command is run on the Head Node
# yum install samba samba-common samba-winbind
- Next, the main samba configuration file is backed up, and a new blank main samba configuration file is opened in an editor by running the following commands
# mv /etc/samba/smb.conf /etc/samba/smb.conf.backup
# vim /etc/samba/smb.conf
- The following configurations are now added to the main samba file. These create a shared folder named “install” which is located under the /windows system path. The Windows Server 2008 R2 DVD installation sources will be copied to this folder.
[global]
       workgroup = PXESERVER
       server string = Samba Server Version %v
       log file = /var/log/samba/log.%m
       max log size = 50
       idmap config * : backend = tdb
       cups options = raw
       netbios name = pxe
       map to guest = bad user
       dns proxy = no
       public = yes
       ## For multiple installations the same time - not lock kernel
       kernel oplocks = no
       nt acl support = no
       security = user
       guest account = nobody
[install]
       comment = Windows Image
       path = /windows
       read only = no
       browseable = yes
       public = yes
       printable = no
       guest ok = yes
       oplocks = no
       level2 oplocks = no
       locking = no
- After having created and edited this new main samba configuration file, the testparm command should be run in order to check and validate the file for eventual errors or misconfigurations:
# testparm
- After validation, the Samba daemons should be started and enabled system wide. This way it is set up to start up automatically after every reboot:
# systemctl restart smb
# systemctl enable smb
# systemctl restart winbind
# systemctl enable winbind
# systemctl restart nmb
# systemctl enable nmb
# systemctl status smb
Share Folder configuration on the Head Node
- In the next step, the /windows folder is created under the root path. The /windows folder is a folder that is specified in the samba conf file. The subdirectory for the Windows installation source architecture, /windows/x64, is also created:
# mkdir /windows# mkdir /windows/x64
- Now the Windows Server 2008 R2 Installation Sources are copied to the paths created above. To upload the Windows Server 2008 R2 DVD Image ISO onto the Head Node, the image can be mounted to /mnt and all the mounted content can then be copied to the samba shared directory, /windows/x64/. The transfer process can take a while depending on the system resources. After it finishes, the Windows Server 2008 R2 DVD Image must be unmounted:
# mount -o loop ~/windows_server_2008R2.iso /mnt
# cp -rf  /mnt/*  /windows/x64/
# umount  /mnt
- The file autounattend.xml at this link should be downloaded and copied into the directory /windows/x64/
# cp autounattend.xml /windows/x64
- After that, the following commands should be run to setup the right owner and permissions. This makes the share readable and fully accessible without authentication:
# chmod -R 0755 /windows# chown -R nobody:nobody /windows
Head Node configuration so that it provisions Windows via PXE
Configuration of the software image and of the category
After logging into the Head Node, the following commands can be run to:
- Create new software image
- Create new category
- Assign the new category to the Compute Node
# cmsh% softwareimage clone default pxewin% commitFri Jan 15 17:31:44 2016 [notice]: Started to copy: /cm/images/deafult-image -> /cm/images/pxewin-imageFri Jan 15 17:40:02 2016 [notice]: Copied: /cm/images/default-image -> /cm/images/pxewin-imageFri Jan 15 17:40:18 2016 [notice]: Initial ramdisk for image pxewin-image is being generatedFri Jan 15 17:41:08 2016 [notice]: Initial ramdisk for image pxewin-image was generated successfully
% category clone default pxewin% set softwareimage pxewin-image% commit
% device use node001% set category pxewin% commit% quit
Configuration of the TFTP Server
The file winpe_amd64.iso is downloaded from this link.
A new folder windows is created under the TFTP Server path.
Now the winpe_amd64.iso and memdisk files are copied inside the /tftpboot/windows/ directory:# cp winpe_amd64.iso /tftpboot/windows/# cp images/pxewin-image/boot/memdisk /tftp/windows/
The PXE boot menu configuration file of the pxewin-image can be opened up with an editor:# vim images/pxewin-image/boot/pxelinux.cfg/default.template
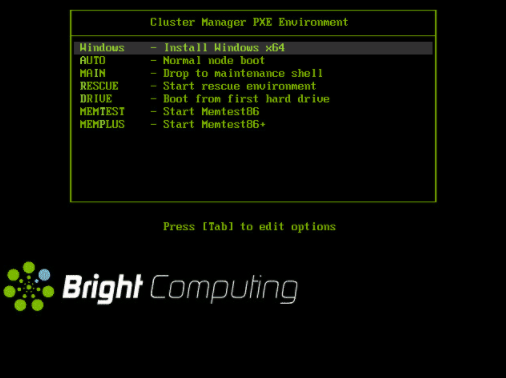
The file can be modified using the following configuration settings:${CMD_SERIAL}
LABEL Windows KERNEL windows/memdisk INITRD windows/winpe_amd64.iso APPEND iso raw MENU LABEL ^Windows - Install Windows x64 MENU DEFAULT
LABEL linux KERNEL ${CMD_VMLINUZ} IPAPPEND 3 APPEND initrd=${CMD_INITRD} ${CMD_KERNPARAMS} MENU LABEL ^AUTO - Normal node boot # MENU DEFAULT
[...]
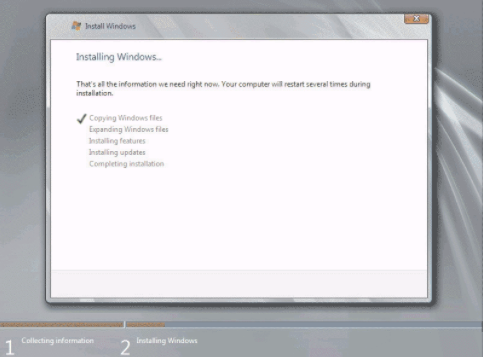
Compute Node Start
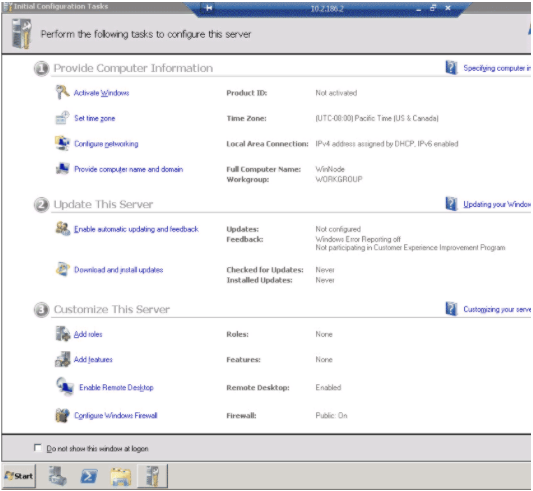
The node should start PXE booting from the head node and start an auto install of Windows Server 2008 R2.
Compute Node Connection via Remote Desktop
A DNAT rule must be added to the Shorewall configuration on the head node, to connect to the regular node via Remote Desktop.
On the head node, the rule can be added to the file /etc/shorewall/rules:# vim /etc/shorewall/rules
[...]DNAT net nat:node001:3389 tcp 13389#LAST LINE -- ADD YOUR ENTRIES BEFORE THIS ONE -- DO NOT REMOVE
The new rule can then be run by restarting the Shorewall service:# systemctl restart shorewall
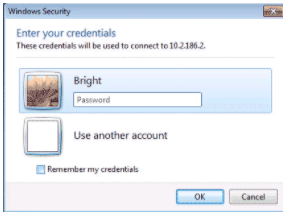
A connection to node001 via Remote Desktop can now be made using the external IP address of the head node, and the remote port 13389:

There are 2 users configured by default. Changing the default passwords is wise. The default username and password combinations are:
- Administrator, with the password: system
- Bright, with the password: system