Azure nodes make use of marketplace node-installer images. In order to use those images, the legal terms need to be accepted. Normally accepting the terms is handled automatically. For cluster extension setups, it is handled during the cluster extension setup. And for cloud based clusters (aka cluster on demand) it is handled during cluster creation. In some cases though, the acceptance of the terms could be revoked. This can lead to errors when trying to power on a node. Such an error may look like this:
[mycluster->cloud[azure]]% device power on westeurope-director
cloud ……………….. [ PENDING ] westeurope-director
[mycluster->cloud[azure]]%
Fri Mar 11 14:43:24 2022 [notice] mycluster: westeurope-director [ DOWN ] (Azure Marketplace purchase eligibility failed. See possible reasons at: https://kb.brightcomputing.com/knowledge-base/azure-mp-terms/
Offer with PublisherId: 'brightcomputing', OfferId: 'bcmni-azure-9-1-free' cannot be purchased due to validation errors. For more information see details. Correlation Id: 'c9e8aec3-14ed-40c6-a9c4-9c78103020ec' You have not accepted the legal terms on this subscription: '1ef3ecdf-b7e2-41d5-aa99-f1aca60230f7' for this plan. Before the subscription can be used, you need to accept the legal terms of the image. To read and accept legal terms, use the Azure CLI commands described at https://go.microsoft.com/fwlink/?linkid=2110637 or the PowerShell commands available at https://go.microsoft.com/fwlink/?linkid=862451. Alternatively, deploying via the Azure portal provides a UI experience for reading and accepting the legal terms. Offer details: publisher='brightcomputing' offer = 'bcmni-azure-9-1-free', sku = 'bcm-ni-azure-9-1-free'
Unfortunately Azure does not provide a straightforward way to manually accept the terms for a marketplace image. The following procedure can be used to accept the terms.
Note: There can be a few other reasons for a “Azure Marketplace purchase eligibility failed” error to occur. If the error message does not refer to the legal terms as in the above example, please contact the support team at http://support.brightcomputing.com.
Reviewing the legal terms for Bright marketplace images
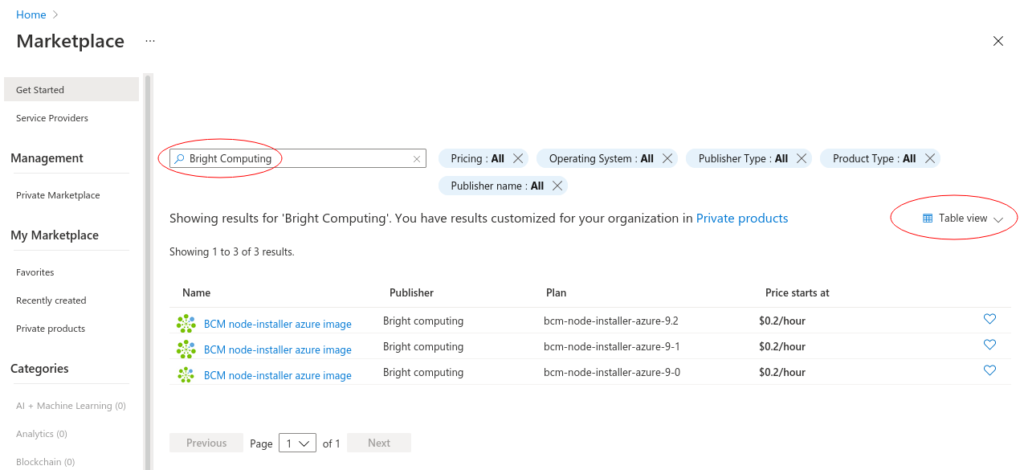
In order to review the terms, log in to the Azure web portal at: http://portal.azure.com/ (When logging in, make sure to use the same credentials that are used by the Bright cluster.) Navigate to the marketplace, and enter Bright Computing in the search bar. It is recommended to switch to the table view, as indicated in the following screenshot:

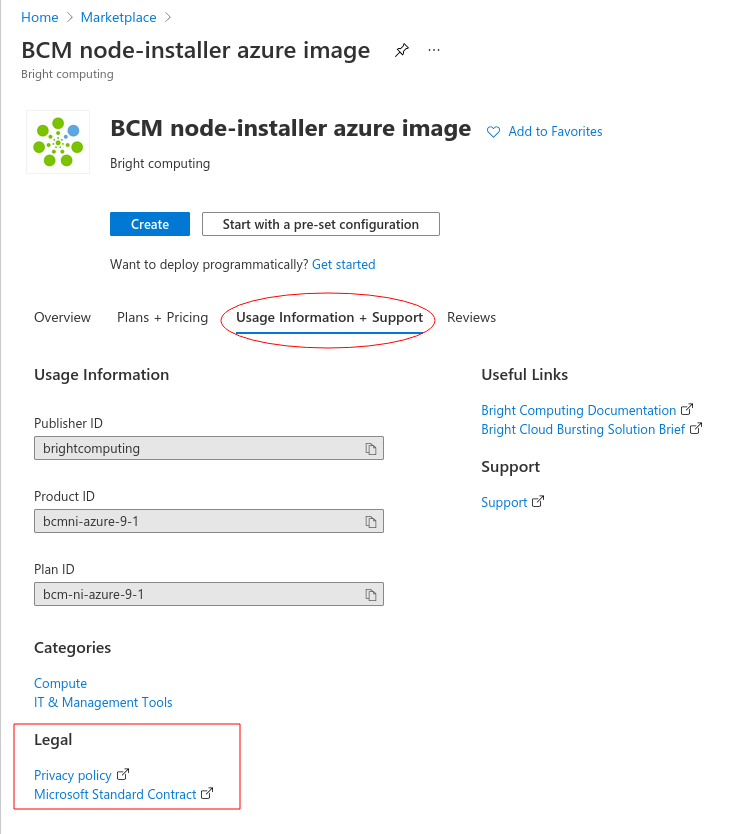
Note that Bright makes use of two separate images. One for nodes that are within the cluster license, for which no extra costs are incurred. And one for nodes that are beyond the cluster license, for which extra costs are incurred. Only the latter show up in the image search, which is why a price is listed. However, the legal terms for both images are the same. To review the terms, select the search result that matches the Bright version of the cluster, as listed in the “Plan” column. On the next screen, select the “Usage Information + Support” tab and click on the links listed under “Legal”.

Accepting the legal terms for Bright marketplace images
The only way to accept the terms in the Azure portal would be to create a virtual machine using the image. However doing so is not very useful, as Bright nodes are managed from the cluster management interface. It is therefore recommended to use the Azure CLI to accept the terms. If CLI access is already set up, the following section can be skipped.
Getting access to the Azure CLI
There are multiple ways to get access to the Azure CLI, documented here: https://docs.microsoft.com/en-us/cli/azure/install-azure-cli
If the Azure CLI won’t be used further, using the Azure CLI from the web based Azure Cloud Shell in the Azure portal may be the easiest way. It can be accessed via the terminal icon at the top of the portal interface:

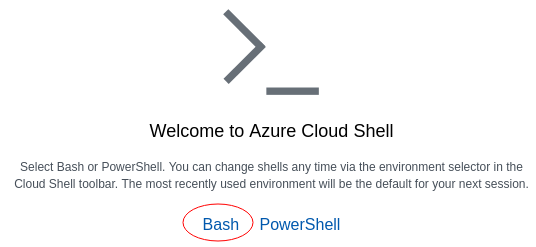
If this is the first time the Cloud Shell is used, it is recommended to use the Bash shell:

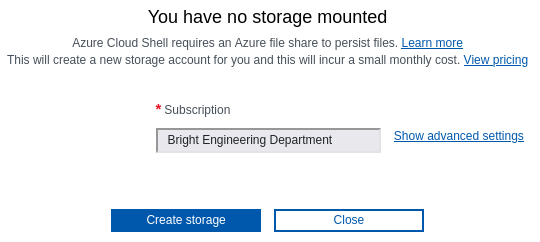
Finally, a storage account will be created for persistent files:

Accepting the terms using the CLI
In order to accept the terms, enter the following commands into the Azure CLI, making sure to use the correct Bright version. Replace 9-1 to match the Bright version of the cluster.
For the image used by nodes within the cluster license:az vm image terms accept --urn brightcomputing:bcmni-azure-9-1-free:bcm-ni-azure-9-1-free:latest
For the image used by nodes bursting beyond the cluster license:az vm image terms accept --urn brightcomputing:bcmni-azure-9-1:bcm-ni-azure-9-1:latest
After accepting the terms, the Azure nodes can be powered on. If you have further questions, please contact the support team at http://support.brightcomputing.com
