You can follow this guide:
Create a virtual machine for the head node
Install a Bright 7.0 head node
Install a Bright 7.0 compute node
Create a virtual machine for the head node
Open the “Virtual Machine Library” and click on “New…” to create a New Virtual Machine.

Choose “Install from disc or image” and click the “Continue” button.

Choose “Use another disc or disc image..”, navigate to the location of the Bright ISO image, then click the “Continue” button.


Choose “Other” as the guest operating system, and “Other (64-bit)” as the version.

Click on “Customize Settings”.

Write the VM name and location, according to your own preferences.
Click “Save” button and a new window with “VM Settings” will pop-up.


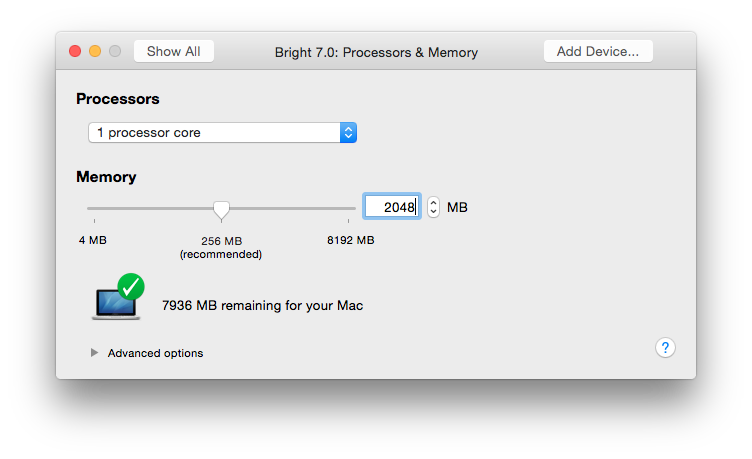
Click on “Processors & Memory” to increase the memory to 2GB, then click the “Show All” button.

Click on “Hard Disk (IDE)”, choose the appropriate disk size, and click on “Apply”. Then click the “Show All” button.

Click on “Network Adapter”, select “Custom -> Private to my Mac” and click “Show All”.

Click on “Add Device..”, select “Network Adapter” and click “Add…”


Choose “Bridged Networking -> Autodetect” for this adapter and click on “Show All”.

Close the window with “VM Settings” to create the VM.
Install A Bright 7.0 head node
Power on the “Bright 7.0” virtual machine and select the “Install Bright Cluster Manager”option.


Once the installer starts, the installation of the head node can continue, as described in the Bright 7.0 Installation Manual (section 3.3).

Install Bright 7.0 Compute Node
A new virtual machine can be created in the same way that the head node was created, except that:
No Bright ISO image needs to be connected to the CD/DVD Device.
only one network adapter needs to be connected, as “VM Internal Network”.
the boot order needs to be re-configured to start with Network (PXE).
In the “Installation Method Windows” select “More options…”, then choose “Create a custom Virtual machine” and click “Continue”.


Click on “Network Adapter”, select “Custom -> Private to my Mac” and click “Show All” button.

Click on “Startup Disk”, select “Network Adapter Host Only” and “Show All” button.

Start the Virtual Machine. The node should start PXE booting from the head node.


