These instructions are not relevant for installations of Bright Cluster Manager 9.2 and newer. An integration with Kubernetes’ Jupyter operator has been introduced in Bright Cluster Manager 9.2 and simplifies the process of running NGC containers in Jupyter. Additionally, Jupyter kernels for NGC containers have been included in Bright Cluster Manager 9.2. Please refer to the Administration manual for appropriate instructions.
Bright’s Jupyter set up can schedule kernels in either in Kubernetes or an HPC workload management system such as Slurm. In Jupyter it is possible to create kernel definitions by instantiating a kernel template, where you would specify information such as the number of GPUs that should be allocated when the kernel will be launched. Jupyter works nicely out of the box with Bright’s ML packages.
Although Bright ML packages can be used without problems on NVIDIA DGX nodes, they are not tuned specifically for DGX. Therefore it is fairly common on a DGX cluster to use container images from the NVIDIA GPU Cloud (NGC).
In order to use NGC containers with Jupyter, a number of preparatory steps will have to taken. Specifically, several packages and files need to be added to NGC containers to allow Jupyter to interact with them. Specifically, Jupyter kernel modules should be installed, as well as a Bright adaptor (ipykernel-k8s.py).
Future versions of Bright (9.2 and higher) will have a Kubernetes operator that will eliminate the need for the Bright ipykernel-k8s.py adaptor. Since several NGC container images already contain the Jupyter kernel module, the expectation is that it will be possible to use NGC container images without changes in a Jupyter set up. The only requirement is that the NGC container images contain the Jupyter kernel modules.
Since we will be extending NGC containers, it will be necessary to have a local Docker registry where we will be storing these images. Alternatively images could also be pushed to an external registry such as Dockerhub, but this will obviously not be as fast as having a local registry. Creating a local container registry on your Bright cluster is quite easy and can be accomplished as follows:
# cm-docker-registry-setupSecondly, we will also need to deploy Kubernetes on the cluster. The can be accomplished as follows:
# cm-kubernetes-setup
To extend an NGC container, we will need a Dockerfile such as the following example which will allow NGC’s PyTorch container image to be used through Jupyter.
FROM nvcr.io/nvidia/pytorch:21.02-py3
COPY files/requirements.py3.txt /tmp/requirements.py3.txt
RUN pip3 install -r /tmp/requirements.py3.txt
COPY files/ipykernel-k8s.py /ipykernel-k8s.py
RUN ln -s $(which python3) /usr/bin/python3
The full example with all relevant files can be found here. The build.sh script contained in the tar file shows how the container image can be built and pushed to your Docker registry.
After the image is pushed to the registry, it is worth making sure the image is available in a local cache of the nodes where it can be scheduled in a Kubernetes pod. This is particularly true if you container registry is not local. The reason for this is that if it takes too long to pull the container image, Jupyter may time out when a kernel is being started.
The next step is to make the image available to Jupyter users in the menu. You will want to create a section in the meta.yaml file that can be found in the following location:
/cm/shared/apps/jupyter/current/lib/python3.7/site-packages/cm_jupyter_kernel_creator/kerneltemplates/jupyter-eg-kernel-k8s-py/meta.yamlThe section should look as follows:
  docker_image:
    type: list
    definition:
      getter: static
      default:
      - "brightcomputing/jupyter-kernel-sample:k8s-py36-1.1.1"
      values:
      - "brightcomputing/jupyter-kernel-sample:k8s-py36-1.1.1"
      - "master:5000/nvidia-pytorch-image:latest"
      display_name: "NGC Pytorch"
    limits:
      max_len: 1
      min_len: 1
The assumption in this example is that your Docker registry is running on the head node on port 5000.
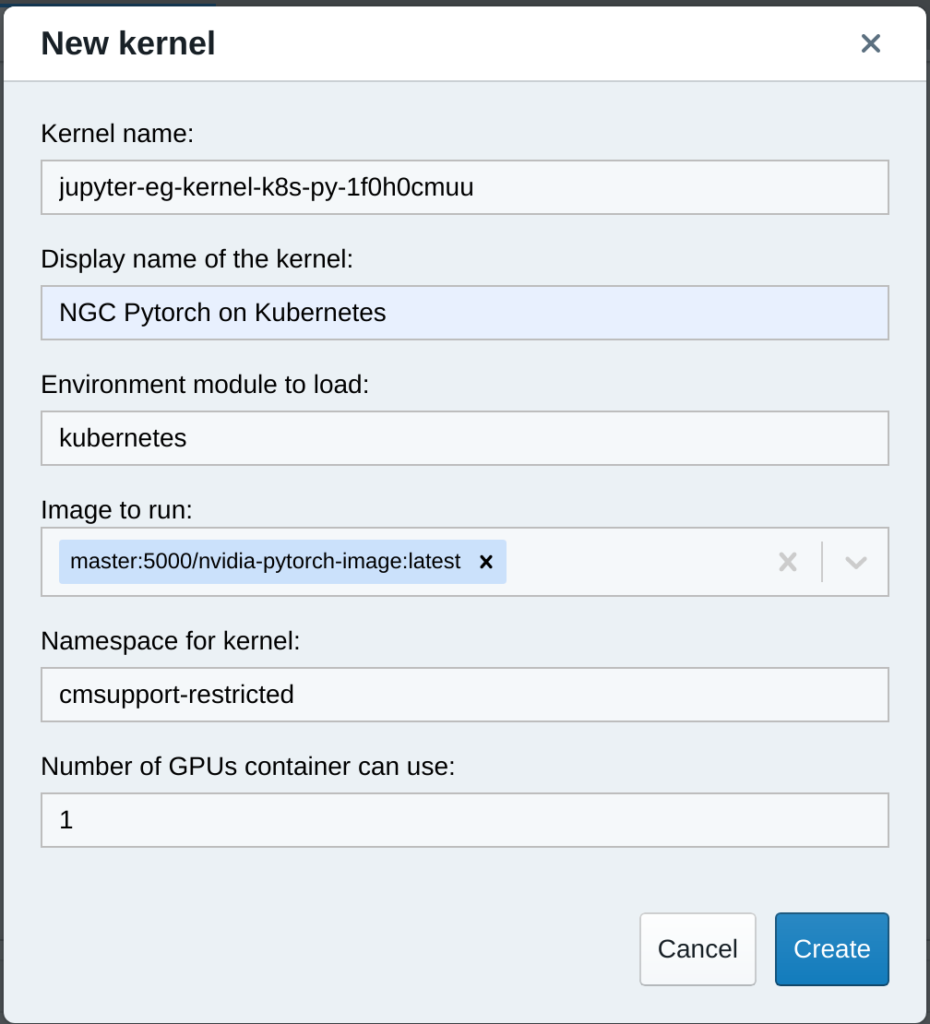
After making this change, users will be able to create kernels using your NGC container image by instantiating the kernel template that will now appear in the kernel template menu:

